• Skip to main content
  • Skip to primary sidebar
  • Skip to footer

securitywing

Menu
  • About
  • Must Read
      • IIS Performance Boost
      • RFID Security
      • Web App Security Testing
      • How to Secure Home Network
      • Prevent Cross-Site Scripting Attacks
      • Renew Self-Signed Certificates
      • Penetration Testing Tools
      • VPN Concentrator
      • Forensic Investigation Tools
      • Digital Certificates
      • Cloud Security Issues
      • Advanced Evasion Prevention
      • Firewall Types
      • Tips to Prevent Data Exfiltration
      • Classified Info Handling
      • MySQL Security
      • Definition of 7 Types of Malware
      • VOIP Security
      • Why Antivirus Software Fails
      • 15 Network Security Vulnerabilities
      • Web App Security
      • IT Security Standards
      • Types of Virtualization
      • Android Security
      • Digital Signature
      • Advanced Malware Protection
    • Close
  • Consultancy
  • Contact

5 Steps to Setup a Nexus3 repository using Docker on Virtual Box.

by wing

Scenario: To create a private docker repository in your local machine for development purpose, you can deploy a Nexus3 docker image with a  persistent volume in a minute. You can either install the docker in your host machine or you can install a Ubuntu virtual box and then install docker on it.

Step1:

At first create Ubuntu virtual machine and then install docker. Next, pull the nexus3 docker image .

docker pull sonatype/nexus3

Ref:https://hub.docker.com/r/sonatype/nexus3/

Step 2:

Create a docker volume and run the Nexus container

docker volume create –name nexus-data

Next, run the docker container. Remember that nexus  container will be exposed on port 8081. You also need to expose another  random port that we will use as a connector port. The connector will be used to push/pull docker image to the nexus reposition from a host machine.

docker run -d -p 8081:8081 -p 8083:8083 –name nexus -v nexus-data:/nexus-data sonatype/nexus3

Note: here, we will use port 8083 for docker repository connector.

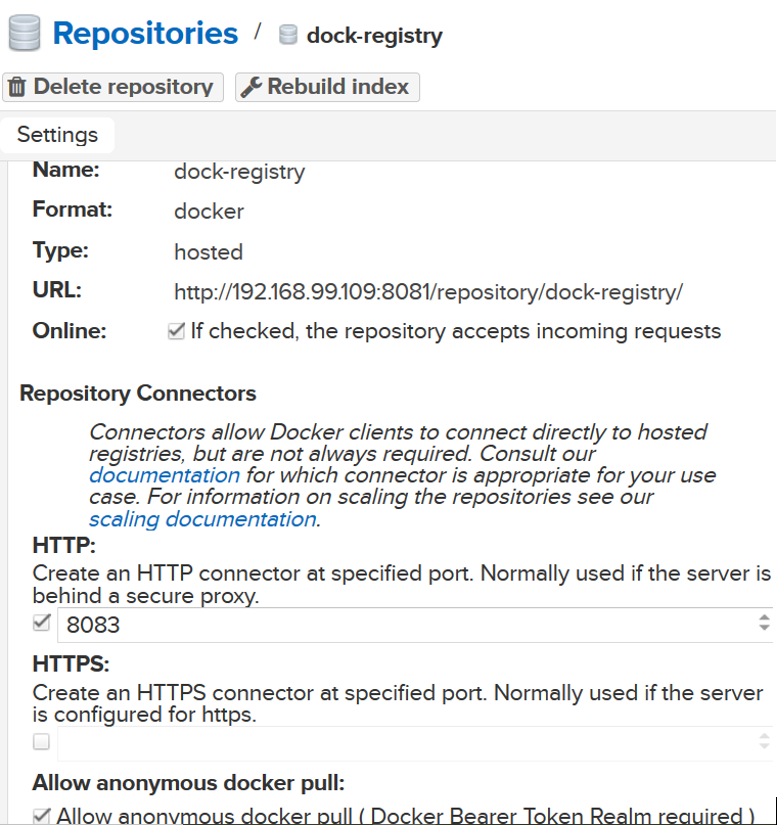
Step 3: create a docker repository

Type a name for the repository and set the HTTP port 8083 that we have opened earlier on the container while running it.

Step 4: Nexus login and user creation

The admin password is located in the /nexus-data/admin.password file in the container.  Login to the nexus using http://vm-ip:8081.  The default admin user name is admin. After logining in, you need to change the admin password and then create a role for the docker:

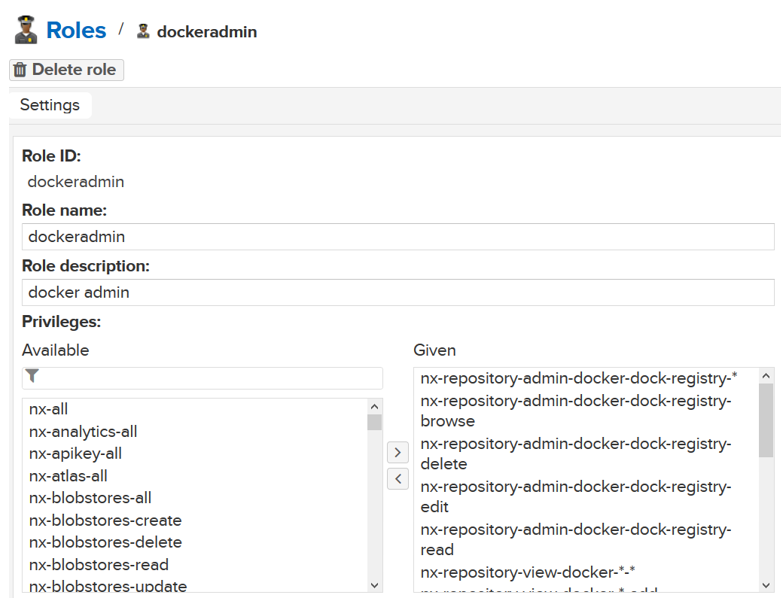
Create a user and add the username in the role.

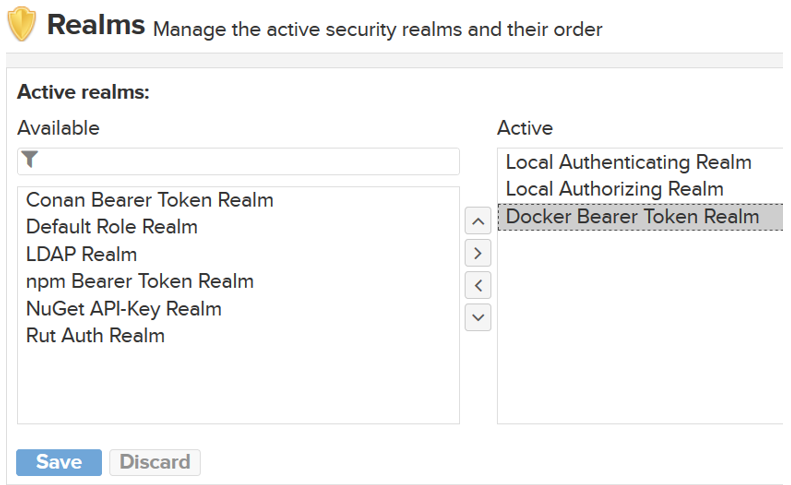
Next, click on ‘Realms’ under security and active the “Docker Bearder Token Realm” as shown below.

Test the connection from the host machine, assuming that password is Password123 the username is docker

docker login -u docker  192.168.99.109:8083  -pPassword123

Step 5: host machine

Create an VM that will simulate the client machine. Make sure the Nexus  VM is reachable from this client machine. Next,  install docker on it,  and then create a daemon.json file in the /etc/docker location.  Add the following lines into this file.

{

  “insecure-registries” : [“192.168.99.109:8083”]

}

Note: 192.168.99.109 is the IP of the Nexus box. You can choose any private IP ad you like.

Restart the docker server

systemctl restart docker

Next, pull a Alpine image.

docker pull  alpine:latest

Tag the docker image using your nexus IP as shown below:

docker tag alpine 192.168.99.109:8083/myalpine:latest

Push the image to your local Nexus repo

docker push 192.168.99.109:8083/myalpine:latest

If you want to pull the image, you can do so as well

docker pull 192.168.99.109:8083/myalpine

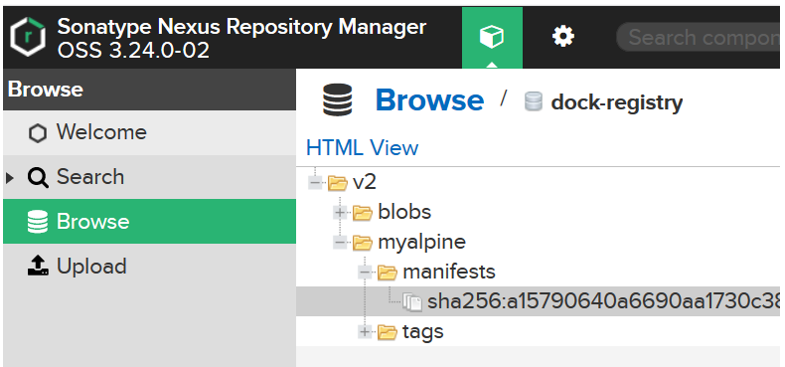
After pushing the image if you go to the browse section and click on your repository, you will see your docker image.

Related Posts:

  • How to Create a Helm Chart in Windows for Minikube
  • Docker Command List with Examples in Linux

Filed Under: containers Tagged With: container, docker

Primary Sidebar

CISSP Sample Test

Take a CISSP Sample Test

CISA IT governance Sample test


Twitter Follow @securitywing

Categories

  • AWS
  • containers
  • Internet Security and Safety
  • IS Audit
  • IT Security Exams
  • Network Security Tips
  • Off Track
  • Telecom
  • Tutorial

Pages

  • About
  • Best IT Security Certification Exam
  • CISA IT governance Sample test
  • CISA Sample Test
  • CISSP Sample Test Online
  • Consultancy
  • Contact

Popular Posts

  • 8 Effective Ways to Impro...
  • 3 Steps to Install Miniku...
  • Yahoo Mail Security Setti...
  • How to Setup AWS CloudFro...
  • How to Configure AAA (TAC...
  • 3 Simple Steps to Capture...
  • 5 Steps to Setup a Nexus3...
  • How to Install AWS CLI an...
  • What is Digital Certifica...
  • How to Configure SNMP in...

Footer

Copyrights

Protected by Copyscape Duplicate Content Detection Software

Securitywing.com reserves the copyrights of all of its published articles.No contents of this site is permitted to be published to anywhere else in the Internet.If any contents are found in any other websites, securitywing reserves the rights to file a DMCA complaint. But you have the right to use the link of any relevant article of this site to point from your website if you consider that it might improve the quality of your article.

Tags

antivirus audit AWS backup browser check cisco cloud computer cyber data database encryption firewall home hsrp ids informaiton internet intrusion it kubernetes linux load balancing malware network protection putty risk router security security tips server ssh SSL switch tools virus vpn vulnerability web webserver website windows wordpress

Copyright © 2010-2023 ·All Rights Reserved · SecurityWing.com