Boto3 allows the python developers to create and manage AWS services such as EC2. You may need to install boto3 in your windows machine for AWS cloud based services development and automation. The easiest way to configure boto on your machine is to install anacond at first. You can download anaconda at https://www.anaconda.com/distribution/.
Once you complete downloading and installation anacond, you need to run the following commands in the anaconda command prompt.
#conda install pip
#pip install pipenv
Next, you need to setup AWS CLI. You can download the msi file from https://docs.aws.amazon.com/cli/latest/userguide/install-windows.html#install-msi-on-windows.
Once you complete installing AWS CLI, you need to configure aws credentials. You can generate the secret keys from the AWS console and take a note of the aws region. Next, type the command below on the Anaconda prompt. Remember that you need to use anaconda prompt, not windows command prompt.
# aws configure – -profile mypython
Note: here ‘mypython’ is the aws profile name I will use later to export in boto.
Type the secret keys and the region.
Now that you have completed setting the environment and the aws cli, you can start writing python codes using boto3. To get started, you can configure python virtual environment using python 3.
# pipenv –three
Next install boto3,
# pipenv install boto3
#pipenv install -d ipython
To run ipyton inside pipenv run:
# pipenv run ipython
#import boto3
# session = boto3.Session(profile_name=’mypyhthon’)
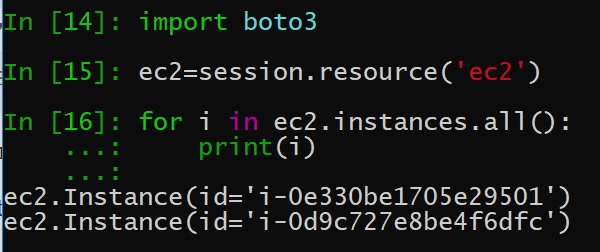
To print all ec2 instances in your account, type:
#ec2=session.resource(‘ec2’)
# for i in ec2.instances.all():
print(i)

If you want to run a python script inside the pip environemnt, you can run:
# pipenv run python mycode.py
To run python code interactively inside a shell:
# pipen shell
#pyton mycode.py
